Merge to HDR in Adobe Photoshop CS2CS3CS4: Tutorial for Converting Images into High Dynamic Range Photographs

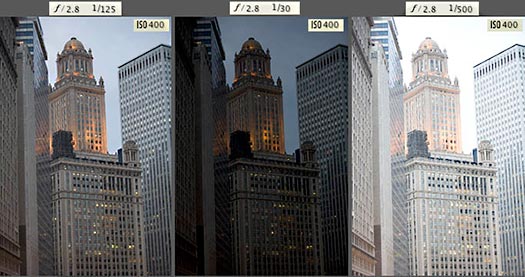
Merge to HDR first appeared in Adobe’s Photoshop CS2 application in 2005. Though not much has changed in subsequent releases, this utility is still used by many photographers to combine a series of bracketed exposures into a single high contrast image containing both highlight and shadow details.
Step 1 – Convert RAW Images to TIFF, PSD or JPG
If the photographs were saved in the camera only as JPG images, skip to Step 2.
To convert from RAW to TIFF, PSD or JPG use software provided by the camera manufacturer (Nikon, Canon, etc.), Photoshop Camera Raw or any other conversion program. When converting, make sure the images have their original exposure settings without any adjustments. Most of the images will not look good at this point, but it is important to maintain the original settings for the HDR process.
Merge to HDR has been criticized for its inability to process RAW files. Converting out of the RAW format causes some data loss, which reduces the effectiveness of the HDR process. TIFF and PSD file formats will preserve more data than JPG, so it is best to use one of those options if enough hard drive space is available.
Step 2 – Merge to HDR
The first step in the actual HDR process is selecting the images to process. In Photoshop, select File > Automate > Merge to HDR from the application menu. In the first window, click the Browse button to choose files for processing. Then click the checkbox to align the source images and click OK.
Aligning the source images is helpful in case the camera moved slightly between exposures. If significant movement occurred, the automated Merge to HDR tool will be unable to properly align the images. Manual manipulation of the images may bring them into proper alignment, but that process is out of scope for this lesson.
Step 3 – Adjust Exposure: Part 1
After the merge process has completed (it may take several minutes), the Merge to HDR tool will display a 32-bit preview along with thumbnails of the original images. It is normal for the preview image to appear dark at this stage of the process.
To make the first exposure adjustment, move the slider under the histogram for Set Whitepoint Preview until satisfied with the result. Further exposure adjustments such as Shadows/Highlights, Levels, Curves and Saturation can be made later.
The resulting 32-bit HDR image should be a normal-looking exposure without strong contrasts. To maintain the highest image quality for future work or printing, save it as either a Portable Bit Map (PBM) or TIFF file.
Step 4 – HDR Conversion
To convert the image for the web or sharing, it is best to save the photograph as an 8-bit JPG file. To make this conversion, select Image > Mode > 8bits/channel from the application menu.
An HDR Conversion window will be displayed using the default Exposure and Gamma method. Move both sliders until happy with the exposure.
For more advanced users, another option is the Local Adaptation method. Local Adaptation activates the Toning Curve and Histogram for fine-tuned adjustments. By using this option, some photographers are able to achieve surreal effects.
After making the desired adjustments, click OK and save the image with Quality level 12 to maintain the highest photographic quality.
Step 5 – Adjust Exposure: Part 2
If the image needs further refinement. use the options under the Image > Adjustments application menu. Most professional photographers use the Shadows/Highlights, Levels, Curves and Saturation tools as needed to achieve the desired effect.