Inexpensive Macro Photography: Extension Tubes: Get All the Photo Detail at a Fraction of the Cost
Macro, or close-up photography, is the art of making life size or larger photographs. A true macro photograph is one where the subject of the photo is the same size as the image produced, or a 1:1 magnification ratio. In general, though, a magnification of 1:4 is close enough to produce life size results on a 4×6 inch print – and as such, many camera lens and accessory manufacturers use the 1:4 ratio to define their “macro” products.
Macro photography can be approached in many ways. Taking pictures of small objects, such as coins and flowers, can be called macro photography. Alternately, taking pictures of small parts of a larger object can also be called macro photography. Photographing the pistil of a flower or the paws of a kitten could be considered macro. It is a fantastic way to get up close and personal with the intimate details of the world around us.
Macro Equipment
There are several options when it comes to macro equipment, ranging from dedicated macro lenses (which are often very expensive), to close-up diopters and teleconverters (moderately expensive), to home grown solutions like inverting and stacking multiple lenses. Today, we’re going to look at an inexpensive option: extension tubes.
Extension tubes are metal or plastic hollow tubes that are placed between your camera’s body and the lens. They serve the purpose of moving your lens further from the film or digital sensor in your camera. Lenses focus by adjusting the distance of the optics in the lens from the film or sensor, and extension tubes simply extend that distance, allowing for greater magnification and a shorter minimum focusing distance. This is particularly helpful when you have a lens that can’t focus close enough to fill the frame with your subject.
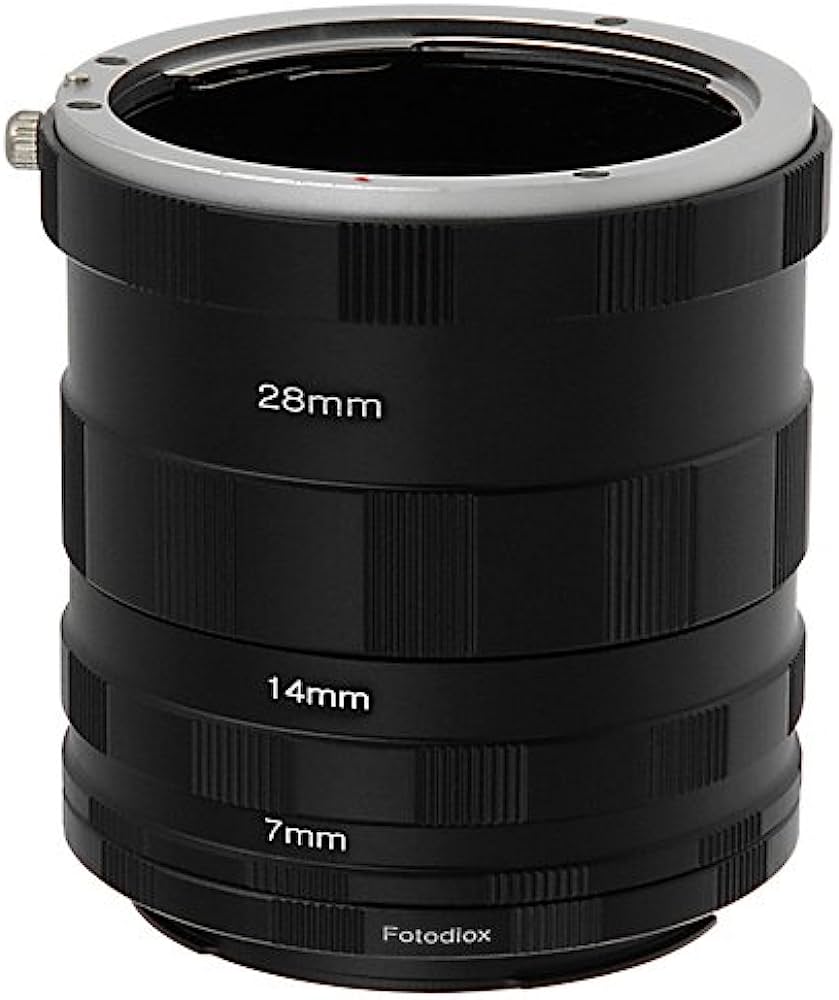
A set of extension tubes typically includes several pieces, including a male connector to mount onto the camera body, a female connector to mount the lens to, and one or more rings of various sizes that mount between the male and female connectors. These pieces allow you to customize the amount of extension. They are typically labelled to indicate how many millimeters of extension they provide.
Magnification
To achieve a true macro 1:1 ratio, add as much extension as you can to match the focal length of your lens, without going over. For example, to achieve 1:1 magnification with a 50mm lens, add as close to 50mm in extension rings as possible. To determine how much magnification you’ve achieved, divide the total extension by the focal length of your lens. With this equation, it becomes obvious that at longer focal lengths, it can be difficult to achieve life size magnification. Don’t let that discourage you, though, as 1:4 magnification can be plenty to achieve impressive results.
Advantages & Disadvantages
There are advantages and disadvantages to using extension tubes.
Advantages:
- Inexpensive
- Easy to use
- No additional glass or optics to degrade image quality
Disadvantages:
- Often require manual focusing
- Some prevent aperture adjustments
- Won’t work with some lenses – check the mount style
Working with Extension Tubes
When working with extension tubes, a tripod is recommended. The minimum focusing distance will be decreased, sometimes to mere inches, resulting in camera shake from the slightest of movements. Often, it is easiest to focus by moving your body towards and away from the subject.
Extension tubes decrease the available light reaching your camera, so slower shutter speeds or a flash may be required in dim conditions.
Try your hand at macro photography with extension tubes and catch all of the detail you’ve been missing!